







What Exactly Is an Embedded SIM and How Does It Differ From a Physical One?
eSIM Cards Explained: How Embedded SIMs Work and Why You Need One
Have you ever wondered why a tiny plastic chip still dictates your connectivity? An BazTel eSIM card is a permanently embedded, programmable chip that replaces the physical SIM, storing your operator profiles digitally and allowing you to switch carriers without swapping hardware. It works by downloading a secure profile directly to the device, which is then activated remotely through a simple QR code or an app. Its primary benefit is the effortless management of multiple numbers or data plans on a single device, while also freeing up physical space for sleeker designs and improving durability against wear or loss.
What Exactly Is an Embedded SIM and How Does It Differ From a Physical One?
An embedded SIM, or eSIM, is a tiny chip soldered directly onto your phone’s motherboard, so there’s nothing to physically insert or eject. A physical SIM is a removable plastic card you swap between devices, while an eSIM stays fixed inside, and you activate it by scanning a QR code or downloading a carrier profile. This means you can switch networks or add a second line without hunting for a tray or waiting for a card to ship. Quick Q&A: “Can I move my eSIM to a new phone?” Yes, but you must transfer the profile via your carrier’s app or settings—you can’t just pop it out. The biggest practical difference is flexibility: with an eSIM, changing plans takes minutes instead of days, and you free up the SIM slot for a physical card if you travel. Physical SIMs still win for instant device swaps, but eSIMs make everyday management far less fiddly.
The Tiny Chip Inside Your Phone: A Layman’s Explanation
Think of the eSIM as a **permanently embedded microchip** soldered directly onto your phone’s main circuit board, not a removable plastic card. It’s a tiny, fixed component—smaller than a fingernail—that stores your carrier profile digitally. Unlike a physical SIM you can pop out and swap, this chip is hardwired into the device’s hardware, meaning you never touch or see it. To change networks, you simply download a new profile onto that same chip, which rewrites its memory over the air. This eliminates the need for a tray, frees up internal space, and removes the risk of losing or damaging a SIM card.

Physical SIM vs. Digital Profile: Key Differences in Form and Function

A physical SIM is a removable plastic card holding a fixed chip, while an eSIM’s digital profile is software stored directly in a device’s embedded chip. The key functional difference is that a physical SIM must be inserted, swapped, or ejected manually, whereas a digital profile can be downloaded, activated, or deleted remotely without touching hardware. Form-wise, a physical SIM requires a tray and occupies space; a digital profile has zero physical footprint. Functionally, a physical SIM ties service to that specific card, but a digital profile allows multiple carrier profiles to coexist on one chip, enabling instant switching between plans without reinserting a card.
- Physical SIMs require manual handling; digital profiles are activated via software.
- A physical SIM holds one carrier identity; a digital profile can store several simultaneously.
- Removing a physical SIM erases access; deleting a digital profile frees storage instantly.
How Does the Activation Process Work for a Built-In Chip?
The activation process for a built-in eSIM chip starts when you scan a QR code or manually enter an activation code provided by your carrier. This code contains a unique activation profile that securely downloads to the chip’s secure element. Once downloaded, the eSIM profile is installed, but not yet active. You must then select this new profile as your active line within your device’s cellular settings. Your phone will connect to the carrier’s network to authenticate the profile, a step that often requires a stable Wi-Fi connection. After successful verification, the eSIM activates immediately, and your old physical SIM profile may remain stored for later use, allowing you to switch back anytime without re-downloading.
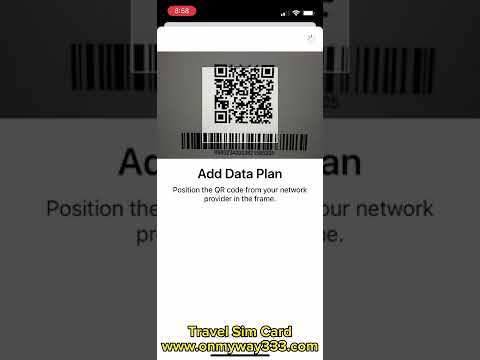
Scanning a QR Code: The Fastest Way to Get Connected
Scanning a QR code is the fastest way to get connected because the carrier encodes all activation credentials—SM-DP+ address, activation code, and confirmation token—into a single visual pattern. Your device’s camera captures this data, and the eSIM software immediately initiates a secure download of the profile, bypassing manual entry entirely. The entire process typically completes in under two minutes, provided your device has a stable internet connection for the profile retrieval. This method eliminates typographical errors and reduces setup friction, making it ideal for travelers who need instant connectivity upon landing. Once scanned, the profile installs automatically, and your device prompts you to activate it, finishing with a single tap. For most users, QR code activation represents the most streamlined eSIM onboarding experience available today.
Manual Setup and Carrier App Installation: Step-by-Step Options
For a built-in eSIM chip, activating without a QR code means choosing between manual setup or carrier app installation. Manual setup requires navigating to your device’s cellular settings, selecting “Add Cellular Plan,” and entering the activation code and SM-DP+ address provided by your carrier—often found in your online account or confirmation email. Alternatively, the carrier app method is more automated: download your provider’s official app, log in, and tap “Install eSIM” or “Activate Plan” within its menu; the app pushes the profile directly to your chip. Both paths take under five minutes, but verify Wi-Fi is stable before starting.
- Manual setup demands your carrier’s SM-DP+ server address and a unique activation code—store both in a notes file.
- Carrier apps usually list a “My eSIM” section; tap it to trigger instant profile download.
- After either method, reboot your phone once and test calls or data to confirm the chip is live.

What Are the Biggest Practical Benefits of Switching to This Digital Technology?
The biggest practical benefit of switching to an eSIM is instant, software-based carrier switching. You eliminate the physical SIM tray entirely, meaning you can scan a QR code or download a profile to activate a new plan in under two minutes—no waiting for a plastic card to ship or fumbling with a paperclip. This is transformative for frequent travelers: instead of buying local SIMs at airport kiosks, you purchase and activate a regional data plan while still on the plane. Moreover, an eSIM lets you hold multiple active profiles simultaneously, so you can keep your home number for calls and texts while routing data through a cheaper local network.
You never need to physically swap anything again, and losing your phone no longer means losing access to your line—you can remotely re-download your profile onto a new device.
That’s the core, daily convenience: zero hardware lag, seamless roaming, and total flexibility without ever touching a tray.
Traveling Abroad: Switching Local Carriers Without Hunting for a SIM Tray
When traveling abroad, the eSIM eliminates the physical ordeal of ejecting your current SIM tray, which often requires a paperclip or specialized tool you likely forgot to pack. Switching local carriers without hunting for a SIM tray means you simply scan a QR code or open a carrier app while still at your departure gate, purchasing a data plan before you land. This avoids fumbling with tiny cards in airport terminals or risking damage to your primary SIM. The tray itself becomes an obsolete bottleneck, especially for frequent travelers who switch countries multiple times in one trip. You retain your home number for calls and texts while the eSIM handles local data, all managed through a single settings menu rather than swapping physical hardware mid-journey.
Managing Multiple Numbers on One Device for Work and Personal Use
Managing multiple numbers on one device becomes effortless with eSIM technology, eliminating the need to carry a second phone. You can assign one eSIM profile to a dedicated work line and another to your personal number, switching between them in settings without swapping physical SIM cards. Work-life separation on a single handset also allows you to keep business calls and messages within a distinct profile, while personal contacts remain untouched. However, only one cellular profile operates for active data at a time, so you may need to manually select which line uses mobile data for downloads or hotspot use. Call forwarding and dual standby features further ensure you never miss an important client call, even while your personal line is idle.
Which Devices Support This Technology and How Can You Check Yours?

Most recent flagship phones from Apple, Google, and Samsung—like the iPhone XS or newer, Pixel 3 or newer, and Galaxy S20 or newer—already have eSIM built in, but you’re not stuck if you own a mid-range model. To check yours, dial `*#06#`; if you see an EID number alongside your IMEI, you’re good to go. Alternatively, dive into Settings: on iPhone, tap Cellular > Add Cellular Plan; on Android, look for Connections > SIM Manager or Network & Internet > Mobile Network. Smartwatches like the Apple Watch or Galaxy Watch also support it, but you’ll need your paired phone nearby to activate. *Remember that carrier support varies, so even if your device is compatible, your current provider must offer eSIM profiles for you to actually use it.* If nothing shows up, your device likely relies on a physical SIM only.
Compatible Smartphones, Tablets, and Smartwatches: A Quick Rundown
Most flagship phones from the last three years—like Apple’s iPhone XS or newer, Google’s Pixel 4 and up, and Samsung’s Galaxy S20 series—natively support eSIM. For tablets, the iPad Pro and iPad Air (cellular models) accept eSIM, as do select Surface Pro models. Smartwatches with LTE, such as the Apple Watch Series 5+ or Samsung Galaxy Watch 4+, rely on eSIM to share your phone’s number. To verify, dial `*#06#` or check Settings → Cellular/Mobile Data for an “Add eSIM” option. If missing, your device likely uses a physical SIM only. Quick compatibility checks save you from buying an unsupported travel plan. While older mid-range phones lack support, most wearables launched after 2020 include it.
Checking Your Phone’s Settings to See If It Has This Capability
To check if your phone supports eSIM, open **Settings** and tap “Connections” or “Cellular” (depending on your brand). Look for “SIM manager,” “eSIM,” or “Mobile plans” – if you see an option like “Add eSIM” or “Add data plan,” you’re good. On iPhones, navigate to Settings > Cellular > “Add eSIM”; on Pixels, go to Settings > Network & internet > “SIMs” > “Add eSIM.” *If you only see a physical SIM slot menu, your device likely lacks this capability.*
| Phone Brand | Settings Path to Check |
|---|---|
| iPhone | Settings > Cellular > Add eSIM |
| Pixel/Android | Settings > Network & internet > SIMs |
| Samsung | Settings > Connections > SIM manager |

How Do You Choose the Right Data Plan for Your New Digital Line?
Choosing the right data plan for your new eSIM starts with checking your phone’s compatibility, then matching the plan to your actual travel or usage pattern. For a short trip, a regional eSIM with a fixed data cap—like 5GB—beats an unlimited plan that throttles speed after a daily limit. Prioritize plans offering tethering and clear coverage maps, since eSIM providers often lease networks, so signal quality varies. Also, compare the cost per gigabyte across a few apps, but factor in whether you need voice minutes or just data. A key trap is buying a 30-day plan for a 10-day stay; look for flexible duration options instead.
Always download the eSIM profile over Wi-Fi before you leave, and confirm the plan’s activation window—some start counting from purchase, not first use.
Lastly, pick a provider with easy top-up options, so you can add data without swapping physical cards.
Comparing Prepaid vs. Postpaid Options for a Chip-Less Setup
For a chip-less setup, prepaid eSIMs offer immediate, finite data packages—ideal for testing coverage or short-term travel—with no credit check or recurring billing attached to your digital line. Postpaid eSIMs, conversely, tie usage to a monthly invoice, providing pooled data and rollover allowances that suit a permanent, multi-device setup. When comparing, prioritize your billing stability: prepaid demands upfront payment per data block, whereas postpaid risks overage fees but simplifies top-ups. The decisive factor is usage predictability—sporadic use favors prepaid’s zero-commitment flexibility, while consistent high-volume use justifies postpaid’s consolidated management. Prepaid eSIMs beat postpaid for strict budget control in a chip-less environment, as you can terminate the line without termination fees.
Choose prepaid for flexible, pay-as-you-go data control; choose postpaid for consolidated, high-usage billing stability—both function entirely without a physical SIM.
Data-Only Plans vs. Full Voice and SMS Bundles: Which Fits Your Needs?
When picking between data-only plans and full voice/SMS bundles for your eSIM, think about how you actually communicate. A data-only eSIM plan is perfect if you rely on WhatsApp, FaceTime, or Zoom for calls—you skip paying for a traditional phone number you won’t use. But if you need to call local businesses, receive bank verification codes, or text friends who don’t use apps, a full bundle saves you headaches. Data-only plans are cheaper and simpler, while voice bundles add flexibility for real-world interactions. For short trips, data-only often wins; for long-term stays, reconsider. Your needs, not global trends, decide it.
What Common Pitfalls Should You Avoid When Using an Embedded Profile?
When juggling an eSIM card embedded profile, the biggest pitfall is deleting it before you’ve backed up the QR code or activation details, leaving you locked out until you contact support. Another classic mistake is switching phones without first removing the profile from the old device—this can tie the profile to hardware you no longer own. Also, avoid scanning a new profile while an old one is still active; some eSIMs only store one at a time, and the new download may overwrite your current data plan. Don’t ignore carrier prompts about profile locks, either. Finally, avoid toggling the profile off during a critical trip, as re-activation sometimes requires a network connection you won’t have. Always read the confirmation screen before deleting anything.
Accidentally Deleting Your Active Line: How to Recover It Safely
If you accidentally delete your active eSIM line, don’t panic—recovery is possible but requires a **safe eSIM recovery process** that avoids locking you out. First, immediately disable airplane mode and check if the profile still appears under Settings > Cellular; if not, contact your carrier’s support via Wi-Fi calling or another device. They can reissue a new QR code or activation code, often within minutes. Never attempt to re-scan an old screenshot of the QR code if it was already used, as this may fail. Always authenticate with your account credentials and IMEI to prove ownership. Once the new profile downloads, restart your phone and verify signal before removing any backup profile.
Q: Can I recover an accidentally deleted active eSIM without carrier help?
No—carrier re-issuance is the only reliable path, because the original activation data is permanently invalidated upon deletion.
Managing Storage Space: What Happens When You Install Too Many Profiles?
When you install too many eSIM profiles, the device’s embedded storage fills up, preventing new activations until you free space. Profile storage limits are fixed on most phones, typically holding 5–20 eSIMs, but each profile retains carrier data, so deletion behavior matters. First, identify unused profiles in your device’s settings; then delete those you no longer travel with—but note that deleting a profile does not cancel your plan, it only removes the local file. After deletion, the freed space allows immediate installation of a new QR code or activation code, though you may need to restart the device for the system to refresh its storage tally.